Visual Studio Code Editor Tutorial
In this tutorial you will learn how to use Visual Studio Code Editor, best for developing any type of JavaScript framework project like Node.Js , TypeScript etc.
First you need to download and install Visual Studio Code.
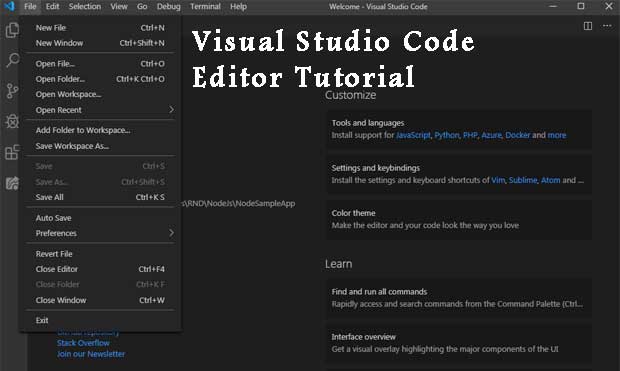
Once you open Visual Studio Code Editor, you will see a screen like below, where you can start creating JavaScript file, html files etc.
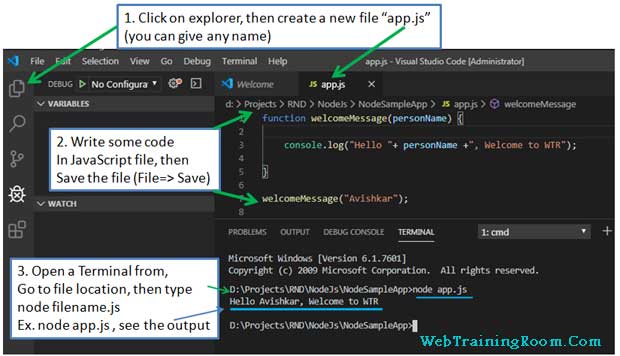
Look at the following few steps carefully, simple step, but understand how it works with VS Editor
- 1. Click on explorer, then create a file called app.js (you can give any name)
- 2. Write simple javascript in the file.
- 3. Save the file ( File=> Save), Don't forget
- 4. Now call the file from console just by typing node app.js

To open a new terminal click on “Terminal” => “New Terminal”.
Before you execute node filename.js command, make sure you are at the right file location, means the folder path where you have saved the file
As you can see in the above screen, "Hello Avishkar, Welcome to WTR" is the result of executing the Javascript file.
Workspace in Visual Studio Code Editor
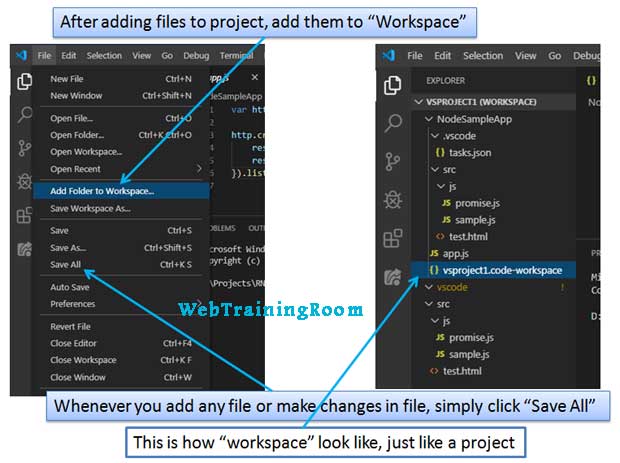
Workspace is just like project, you can add any folder to workspace, before you can run any task in JavaScript file, and file needs to be under workspace, when you add any folder in workspace, all files under that get added automatically.
After making changes in multiple files or adding files, you can simply save the workspace, all files will gets saved.

Simply go to your ".vscode" folder , and rename or delete the file "tasks.json" (this file will be re-genrated)
If you want to display the output on browser then you need to install the "Open in Browser" extention, you either can install from extention list below or from visualstudio marketplace
So, now if you are ready with Visual Studio Code Editor, you can start looking at some of following tutorials
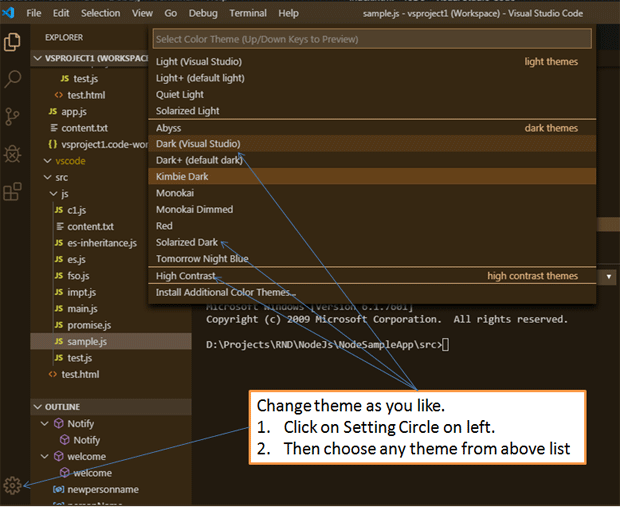
You can change any colour theme in your visual studio code editor, by defaults it comes with dark black theme, but you can change that to anything you want.

As you can see in above screenshot, I have changed the theme to a different color, you also can install addition theme if you want, just click on “install additional color theme” from above menu


