ASP.NET Core MVC Project with Database Example
Asp.Net Core MVC for Beginners Step by Step, in this tutorial we learn how to develop Model View Controller Application using Asp.net Core Framework.
Before you learn MVC in Asp.Net Core, We suggest you to have good understanding about Model View Controller in Asp.net, because in this article we talk about only what we implement differently in Asp.net Core.
Here are the steps we perform to create an Asp.Net Core MVC application with Entity Framework Core as Data Access Layer
- Create an Asp.Net Core MVC Application
- Create new Controller for Student
- Model for Student with property Validation
- A Razor View for Student, where we can add new student and display the list
- A new Entity for Student and a Table in database
- Implement Code First approach in Entity Framework
- Finally Create new student and display them all on screen
Creating Asp.Net Core MVC Project
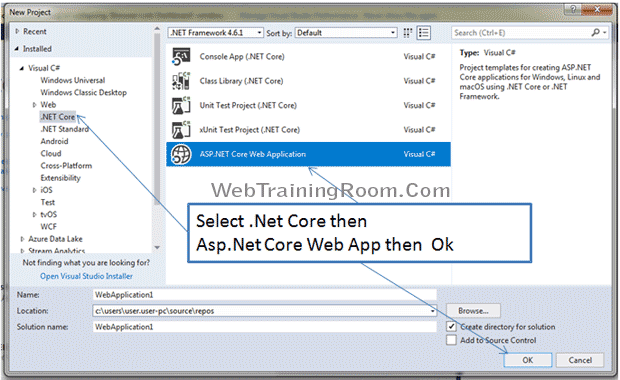
Open Visual Studio 2017 and above then select new project, under "Web" select ".Net Core"
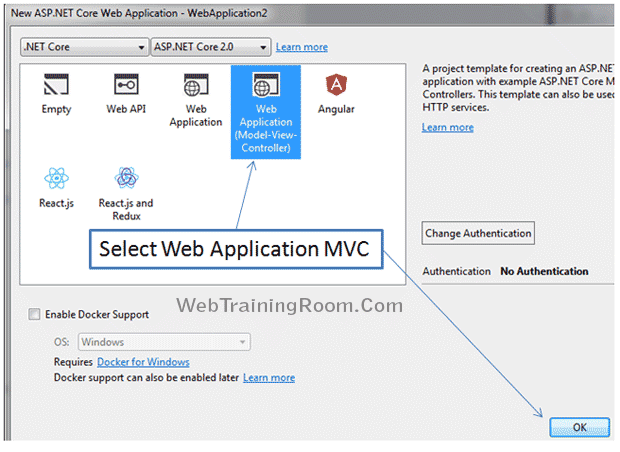
Now there are different types of Asp.net Core Web Application, Select Model View Controller
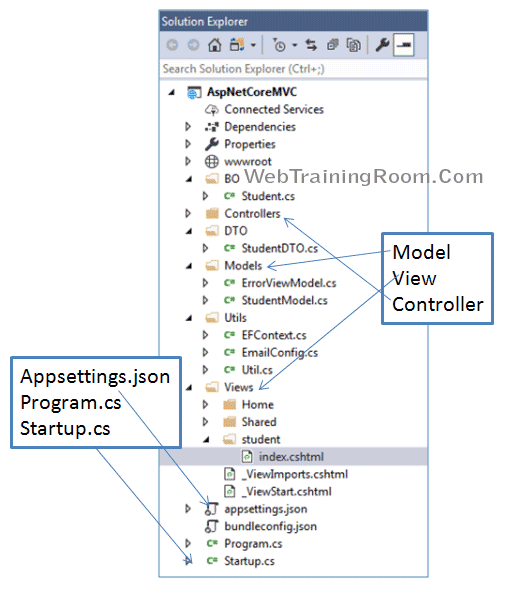
Basic structure of Asp.Net Core MVC Application, here we set up student model, view and controller.
using System.Collections.Generic;
using System.ComponentModel.DataAnnotations;
namespace AspNetCoreMVC.Models
{
    public class StudentModel
    {
        [Required(ErrorMessage = "Firstname Required")]
        [StringLength(50, ErrorMessage = "5 to 50 characters.", MinimumLength = 3)]
        public string FirstName { get; set; }
        [Required(ErrorMessage = "Lastname Required")]
        [StringLength(50, ErrorMessage = "5 to 50 characters.", MinimumLength = 3)]
        public string LastName { get; set; }
        [Required(ErrorMessage = "Email Required")]
        [EmailAddress(ErrorMessage = "Invalid email")]
        public string Email { get; set; }
        public string Mobile { get; set; }
        public List<Student> Students { get; set; }
    }
}
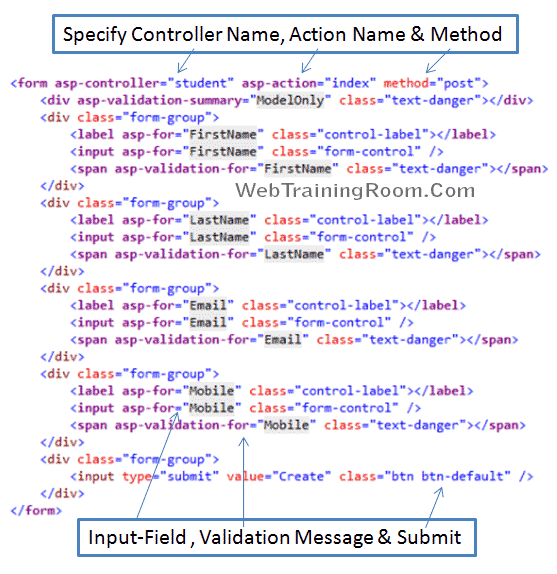
Here are some important tags for designing form in Asp.Net Core Razor.
Please notice how syntax is different than earlier Asp.net MVC
-
Controller
<form asp-controller="controllerName"/> -
Action
<form asp-action="actionName"/> -
Method
<form method="post"/> -
Field
<input asp-for="fieldName" /> -
Validation Message
<span asp-validation-for="fieldName" /> -
Submit Button
<input type="submit" />
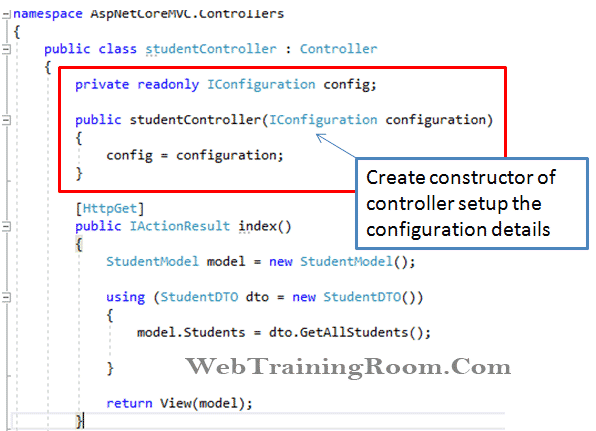
Also there is another way to read the configuration from appsettings.json information into DbContext
Here we create a new controller, where we can add a new student and display the list of student
using Microsoft.AspNetCore.Mvc; using Microsoft.Extensions.Configuration;
using AspNetCoreMVC.Models;
using AspNetCoreMVC.DTO;
/// <summary>
/// Written by WebTrainingRoom.Com
/// </summary>
namespace AspNetCoreMVC.Controllers
{
public class studentController : Controller
{
private readonly IConfiguration config;
public studentController(IConfiguration configuration)
{
config = configuration;
}
[HttpPost]
public IActionResult index(StudentModel model)
{
Student _student = new Student();
_student.Firstname = model.FirstName;
_student.Lastname = model.LastName;
_student.ContactNumber = model.Mobile;
_student.Email = model.Email;
using (StudentDTO dto = new StudentDTO())
{
dto.AddStudent(_student);
}
   return RedirectToAction("index", new { msg = "New Student Added" });
        }
        [HttpGet]
        public IActionResult index()
        {
            StudentModel model = new StudentModel();

            using (StudentDTO dto = new StudentDTO())
            {
                model.Students = dto.GetAllStudents();
            }
            return View(model);
        }
    }
}
Here is how our DataTransferObject called "StudentDTO" will look like, learn about DbContext class EFContext() in entity framework Core
using System;
using System.Collections.Generic;
using System.Linq;
/// <summary>
///  Written by WebTrainingRoom.Com
/// </summary>
namespace AspNetCoreMVC.DTO
{
    public class StudentDTO
    {
        public Student AddStudent(Student s)
        {
        using (EFContext context = new EFContext())
        {
            context.tbStudent.Add(s);
            context.SaveChanges();
        }
    return s;
}
public List<Student> GetAllStudents()
{
List<Student> list = new List<Student>();
var context = new EFContext();

    list = context.tbStudent
        .ToList<Student>();


return list;
}

}
}
You may be interested to read following posts

